
You can change the fonts used on reports and statements. You have control over most aspects of the reports. This includes the font family, size, and style to use for headers, footers, subheads, body, and so forth. This feature can help you maintain a particular style or image for your practice.
The number of fonts available for selection is dependent upon the number of TrueType and resident printer fonts installed on your system, of course, but is unlimited.
You can also control the style and the size in which the font is printed. For example, you can specify that a font print bold, italic, or bold italic. Then, you can specify the size of the font, from 8 points to 72 points. Generally speaking, there are 72 points to an inch, so a 72-point font will be one inch in height.
Note: If you change a font, it should be similar to the default font in size, since this could adversely affect the layout of printed reports.
The following is a list of fonts that you can customize:
· Header Font |
· Appointment Book View Font |
· Sub Header Font |
· Label Font |
· Body Header Font |
· Other Claim Font |
· Body Bold Font |
· Label First Line Font |
· Body Font |
· Miscellaneous Font |
· Body Condensed Font |
· Appointment Reminder Label Font |
· Footer Font |
|
Headers appear at the top of or beginning of reports or major sections of reports. Body fonts make up the bulk of the report. Footers appear at the bottom of reports in the form of page numbers or notes.
Note: Some fonts may print slower or faster from your printer. If you select a font that is too large, some portions of the text may be cut off or overrun other text.
To set up report fonts
1. In the Office Manager, click Maintenance,, point to Practice Setup, and then click Report Fonts Setup.
The Report Fonts Setup dialog box appears.
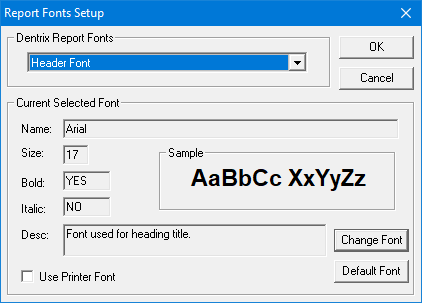
2. In the Dentrix Report Fonts list, select the type of report font that you want to change.
The current font, style, and size appear under Current Selected Font.
3. To change the font, style, or size, click Change Font.
The Font dialog box appears.
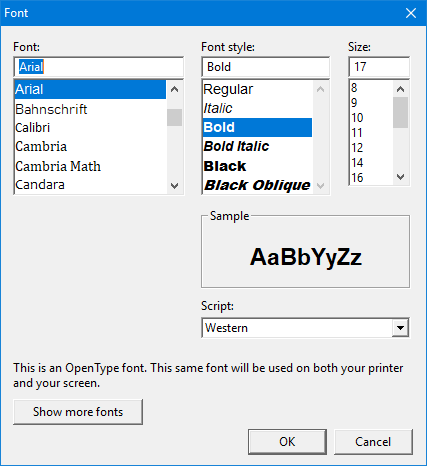
4. Do the following:
· Font – Select the desired font family from the list.
Note: Only TrueType fonts and resident printer fonts appear in the list.
· Font style – Select a font style, such as Regular or Bold.
· Size – Select a font size.
5. To save your settings, click OK.
The Font dialog box closes, and a sample of the font family, size, and style that you set up appears in the Sample area of the Report Fonts Setup dialog box.
6. To reset the font to its default settings, click Default Font.
7. To use a resident printer font, select Use Printer Font.
8. To save your changes, click OK.